Due to COVID-19, K12 teachers have been thrust into the role of distance learning teachers without much training or guidance into the unique challenges and rewards of teaching online (versus face-to-face). Also, teachers are using Google Classroom, which not really a full Learning Management System (LMS), which presents some distinct challenges.
In this post, I will share some ways to make distance learning more engaging for students. In addition to 23 years teaching, 3rd grade classroom, elementary tech, and middle and high school engineering, and 5 years as a an ed tech consultant, I have also been a part-time lecturer for many years at the Tufts Center for Engineering Education and Outreach Teacher Engineering Education Program (TEEP) and I have converted face to face classes to online classes for the Collaborative for Educational Services and PBS Teacherline. I picked up many of tips directly from these organizations as well as my own experience. I hope you find them useful!
- Supplement asynchronous with synchronous options. I would say for grade 5 and up, scheduled, asynchronous distance – where students access material when they want to – within a specific schedule – works best. The scheduled part differs from totally self-paced material, which does not lend itself to class interaction and can be isolating. While this post will focus on scheduled, asynchronous learning, synchronous options can be used as a supplement to get some “face to face” time. In a recent middle school Make Your Own Instrument I designed and ran with a music teacher colleague, we had a synchronous kick off meeting using Google Meet Hangouts. We also had daily office hour time, where we keep a Google Meet open for specific one to one help. Finally, for the culminating synchronous activity, students played Hot Cross Buns on their homemade instruments for the rest of the class. We also had a special guest from another part of the county join us who made and played a “slide potato”.
- Use lots (but not too much) of multimedia. It’s important to remember that lots of students have reading issues. It’s also challenging to face large amounts of text on a screen. Many students, as my own very social 13 year tells me, lose a lot of motivation for repetitive or long assignments sitting in front of a computer or other device, which has many interesting games or tabs, etc. So the more simulations, games, interactivity, videos, images, audio, the better. Of course, this needs thought. You don’t want a long, boring “talking head” video either. Podcasts are often a good option.
- Use regular, narrated slide shows “podcasts” with personal connections to yourself and students. Depending on the length of unit (semester or week-long), we produce either weekly or daily podcasts respectively. These are probably not strictly podcasts but podcasts in more general sense of regularly scheduled content available asynchronously online. [Strictly speaking, podcasts are typically defined as audio content available via a subscription service.] For the semester long TEEP courses, I use Apple Keynote to create my slides. I include lots of images and photos. Typically, I share a few things about my week and then do a mini-lesson, if needed, on the week’s content. Then I go over last week’s submitted work, going any points that seem to be confusing. I also summarize common themes in the content response assignment. I also drop in photos of learner’s work and may even say something about each photo (or video) or learner work. I end with a review of the week’s assignments. Note how it’s important to make an extra effort to try to connect with learners in multiple and different ways since it is asynchronous and you don’t have that regular, face to face contact. Here’s an example of a daily student podcast from the music unit. Note since this was daily, I did not have sufficient turn-around time to show and summarize student work.
Here’s a slide from a TEEP podcast, where I would show and talk about each students’ work (no audio in the example below but there was in the podcast).
- Respond quickly. Since there is not quick and frequent face to face social interactions online, responding to students quickly is important. I would include grading, answering email as the main ways. I have a TA monitor the learner discussions in TEEP classes and also answer first level tech questions quickly.
- Testing as a student. It is very handy to test your material as a student sees it. I asked our tech department to create a special student account for this purpose. We do the same thing in Canvas at Tufts. [Canvas is the full featured LMS we use at Tufts. ]
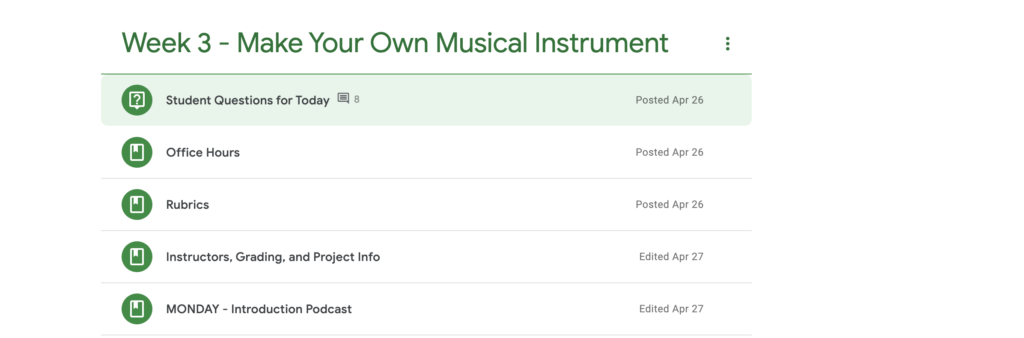
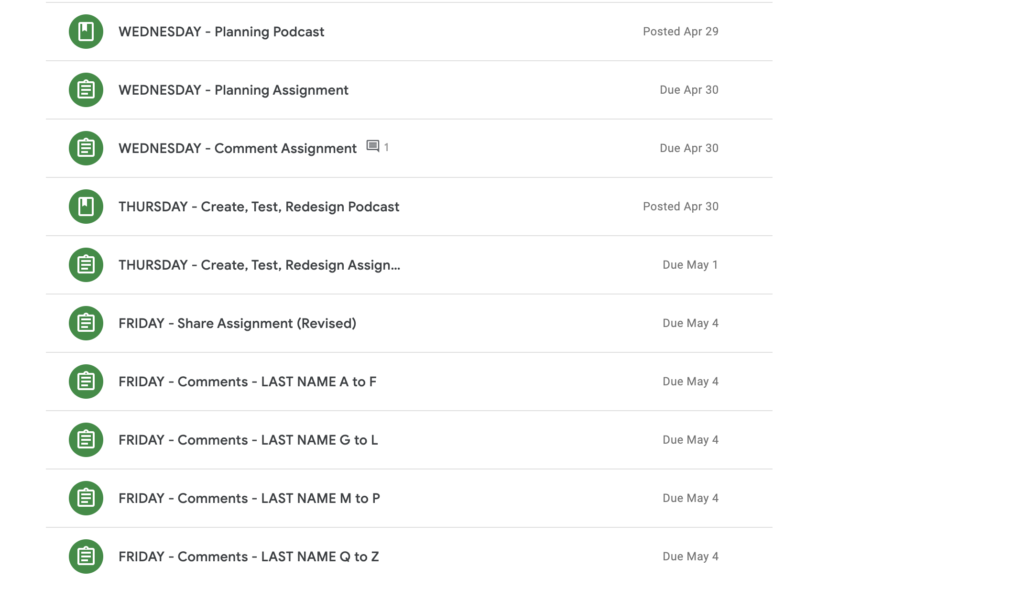
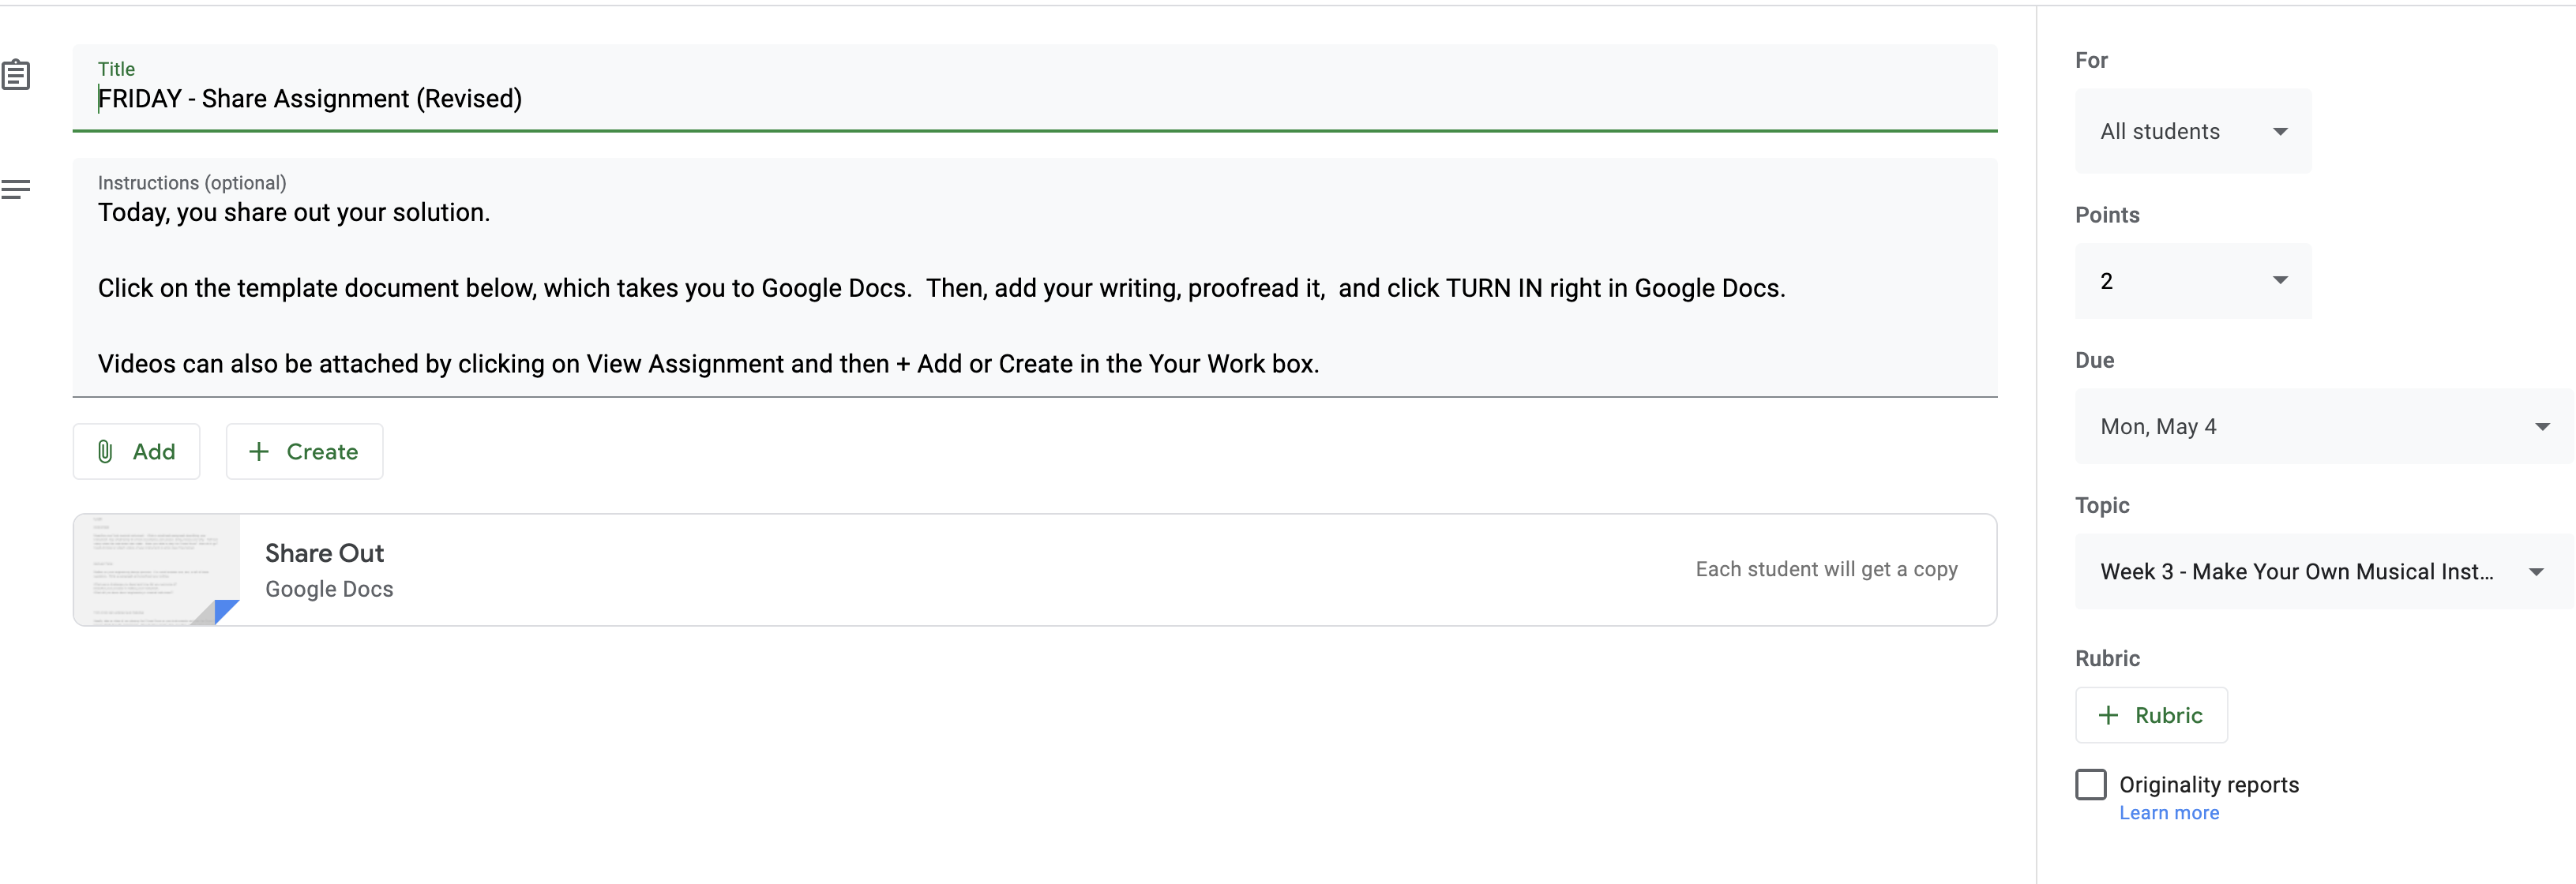
- Consistent, regular, format with clear expectations. All learners will benefit from consistent formats and clear expectations but be prepared to be bombarded with questions from middle school and younger students if you do not! Post a grading rubric so students are clear on how they are graded. Use Google Classroom assignments for all assignments. [Don’t have students post assignments in the stream.] Send comments and grade with the assignment tools. Also, note the grade tab to see results for class. Here’s a snapshot of how our Make Your Own Musical Instrument module is organized. Note that we have clear weekly topics and clear daily assignments. The general pattern each day was Podcast, Assignments, Comments Assignment.
At TEEP, our regular format is: podcast, reading or video content, reflection on content with learner comments, and hands on assignment with learner comments.
For assignments in Google Classroom, I always provide a Google Doc – Choose Make a Copy for Each Student so that each student gets a structured document with embedded directions. That way, they don’t have to flip between multiple tabs to see what they have to do. Note that I always fill in the due date so the student will know and be notified about upcoming deadlines. Also, the turn in directions are right there and are standardized but we keep a copy in a shared teacher google doc.
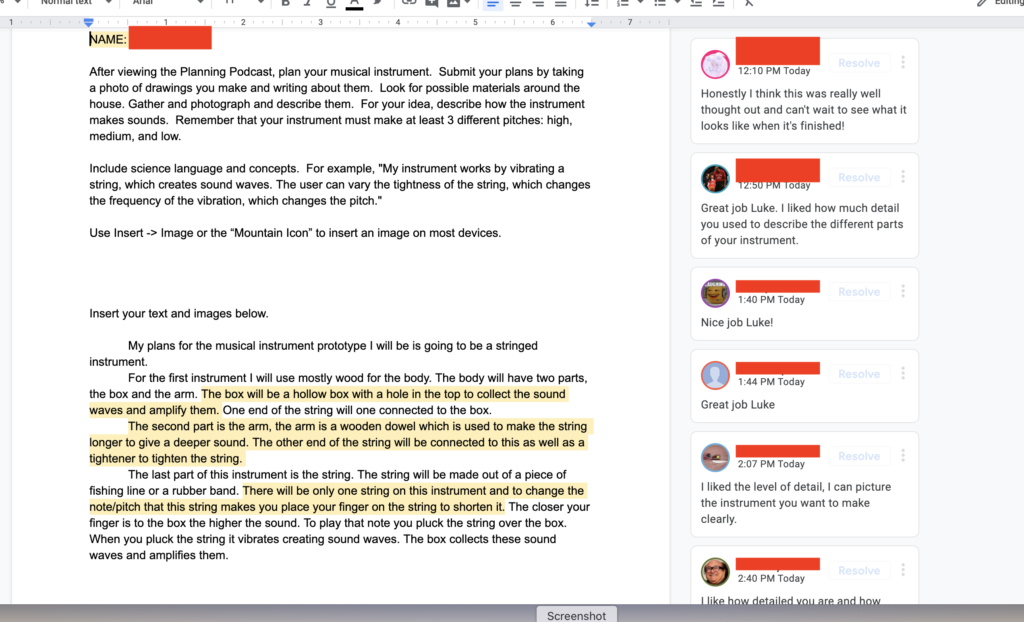
- Use learner to learner peer commenting. This article from Alice Keeler has a great technique for how to do peer commenting in Google Classroom. It’s not obvious (again, GC is not a full LMS, which would have this built in). We did find a few caveats. Doing middle school classes of 60 students, only 20 student works can be attached to an assignment so we just broke them up by last name. Last name is how you can select subsets of students to assign things to. Google Classroom does not have the concept of subgroup unfortunately. See the Friday comment assignments above. Also, some students were very anxious to do their commenting assignment right away. However, in this method, the teachers has to add the student google docs manually so it takes a while. Next time, I would make the commenting assignment the next day to give me a chance to load the student work. This method has students insert comments directly into the other students’ work, which promotes more specific, detailed, and meaningful comments. In contrast, in my view, having students post and comment on the stream encourages less detailed, summary comments, plus can be a confusing long, “stream” of comments and content.
Here’s an example of what it can look like.
- Use discussion questions. Many online courses, such as the ones I worked on for PBS Teacherline, had weekly discussion questions. The trick here is to come up with one deep question that uses higher level’s of Bloom’s Taxonomy. Avoid long lists of questions (question banks and low level factual questions). You want to have a question that will have many differing responses and reactions. Note that Google Classroom has a specific option for Discussion questions – + Create Question. There’s an option so that students can reply to each other.
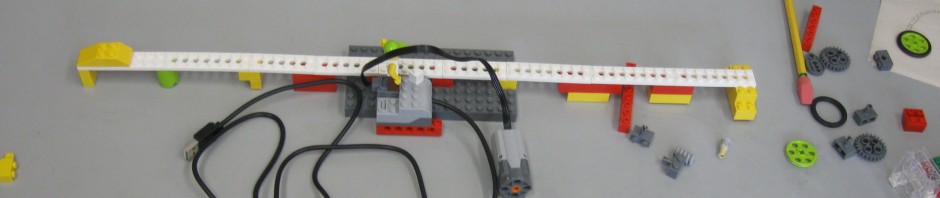
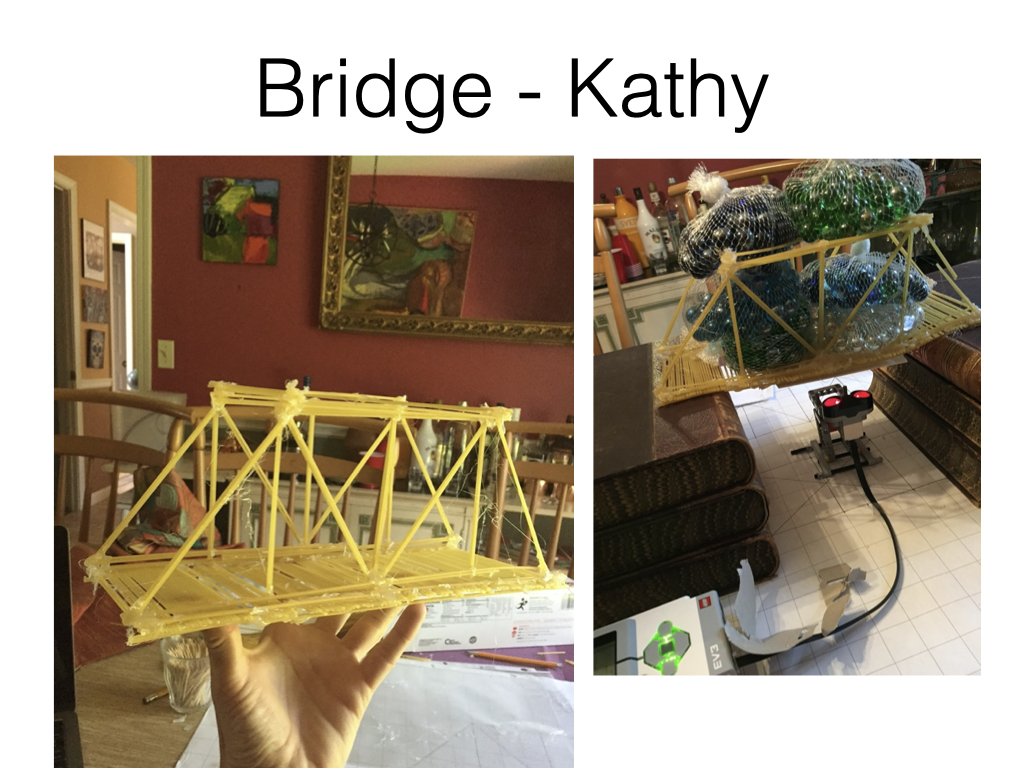
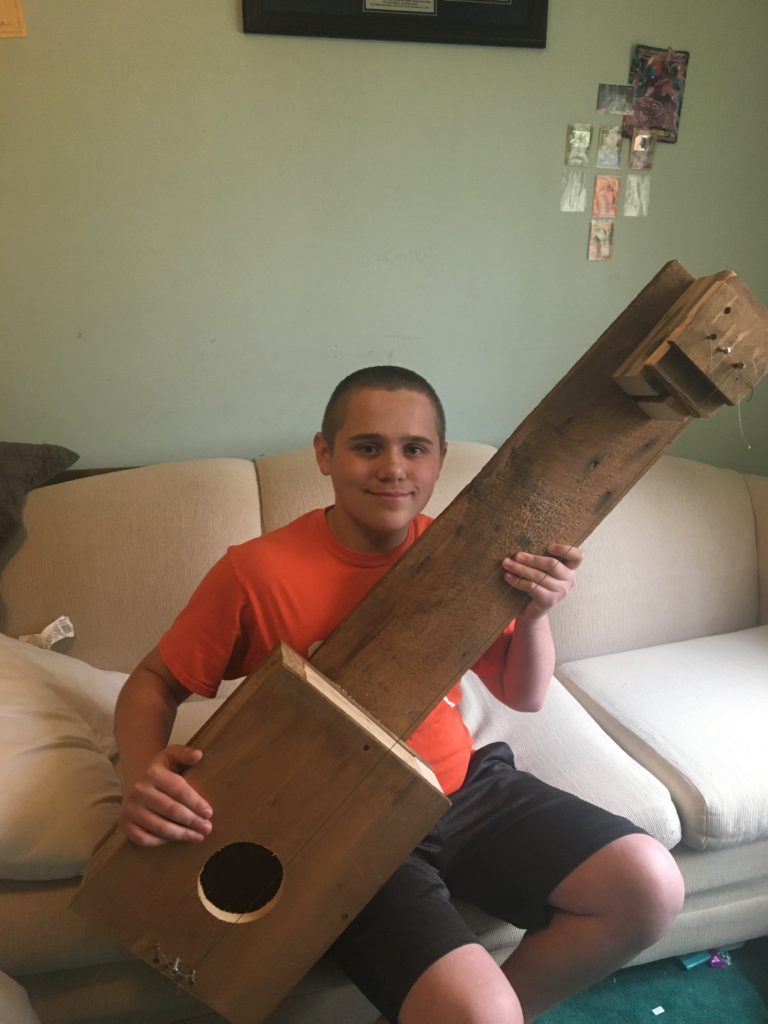
- Use remote hands on activities. Don’t keep students sitting at the computer. Try to think of hands on activities they can do. This can be challenging since you can’t easily send home common materials that everyone will have. But this is precisely what we did with the Make Your Own Instrument module and we discovered everyone had something that could be used. For example, homes all had three glasses that could be filled with different amounts of water. Some students did much more!
- Keep everything short and sweet but not too short. Enough said!
Good luck and happy remote teaching! Hopefully, we will be back face to face soon!